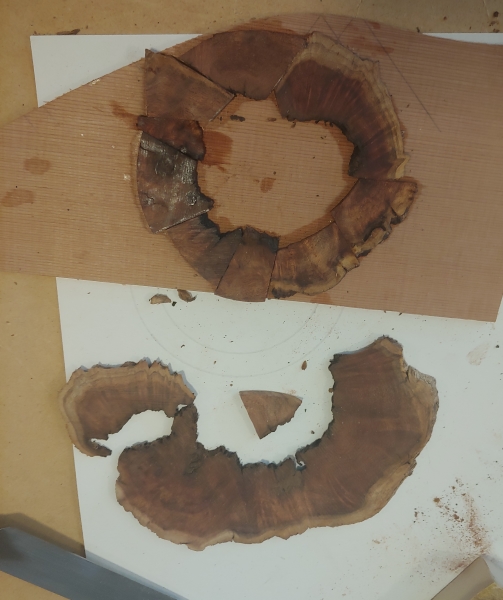
I love the natural beauty of timber. Burl wood is especially fetching to me, and I occasionally use it for my instrument rosettes. I start the process by slicing the burl into 2mm thick slabs. I next mark the size of the rosette onto some scrap timber. Now comes the fun part. I cut the slabs into tiles and fit them together to cover the lines on the timber I drew previously. Years ago, I used to cut my tiles into identical sizes (like slices of pie) and fit them together. Now, I hate wasting so much of this prized wood; so I fit them together any which way they will go. I find that this makes for a much more interesting rosette to my eye. When I make straight grain timber rosettes of tiles I prefer the even tiles, (so the grain is all pointing in to the sound hole) but burl is a different beast. Once the tiles are cut, I trim the joining edges with a sharp chisel to make a good joint. I fit all but the last tile. Now it’s time to glue the tiles to the timber using hot hide glue. After I have glued all but the last tile, I can cut and fit the last tile in place so there are no gaps. I don’t worry how much I am outside the lines as all that will be cut off when I trim the rosette with my cutter. Why glue the pieces to a piece of scrap timber? I can drill a center post hole through the timber to use my rosette cutter. It also supports the tiles so I can thin them with a small scraper plane. I plan to post more on this in the future for those who are interested.